If you’ve ever walked into your basement after a heavy rain and felt your stomach drop at the sight of rising water, you know exactly why Sump Pump Replacement matters. A sump pump is pretty much the quiet hero of your home, working behind the scenes to keep your basement dry and prevent water damage. But like anything mechanical, it won’t last forever, and knowing how to diagnose issues early can save you money, stress, and a whole lot of cleanup.
Most common problems can be sorted out by yourself, before you dial a professional. You may even change the pump by yourself if it is easy for you. This is a stepwise explanation of what homeowners get into and what it is, and how to repair it without putting any lives at risk.
Why Sump Pump Replacement Fails?
A sump pump typically lasts 7–10 years, but several factors can shorten that lifespan. One big issue is power failure. Simply put, your pump can’t work if electricity is out, which is usually when you need it the most. Another common problem is clogging. Dirt, debris, gravel, or even sand can block the pump or the float switch, stopping it from turning on or off correctly. When that happens, you’ll eventually need a Sump Pump Replacement because the motor can burn out quickly.
Another culprit is overworked pumps. If your area such as parts of Renton, WA, which often experience heavy rainfall or sit on lower ground gets a lot of water, your pump may run constantly. And nonstop cycling does wear the pump out much faster in such a situation. The most important thing is catching the problems early so you can plan ahead and avoid sudden failure.
Signs You Need a Replacement
You will first hear it when you discover some strange noise, as sump pumps are not noisy ones. When it starts grinding, rattling, or screeching, then it is bad news for you. Another red flag is frequent cycling, turning on and off repeatedly, even when it’s not raining. This usually means the float switch is stuck or damaged. The majority of them begin to consider Sump Pump Replacement rather than hammering and fiddling if it goes that far.
You’ll also spot rust. A small surface of the iron bacteria is normal, but once the corrosion is large then it blocks the flow of water and cuts power. Can you guess the clearest sign? The water in your basement, the “silent” flood warning that your pump is retiring soon.
DIY Troubleshooting Before Replacing
It will be a really good idea to try these simple fixes before you jump to a full Sump Pump Replacement:
- Check the power source
Ensure that the plug of the pump is inserted and the outlet is working. It may be the entire deal of a blown fuse.
- Clean the pit
The pump or float may get clogged with dirt, sludge, and debris. A clean pit allows the pump to work efficiently.
- Test the float switch.
Add a bucket of water to the pit. In case the switch will not float or kick the pump, it is likely to be jammed. Shuffle it, and it may start working again.
- Inspect the discharge pipe.
Pipes that may be outside may freeze or become clogged. A discharge blockage causes the pump to overwork and ultimately destroy the pump.
If none of these steps fix the issue, then it is probably time to move toward a Sump Pump Replacement.
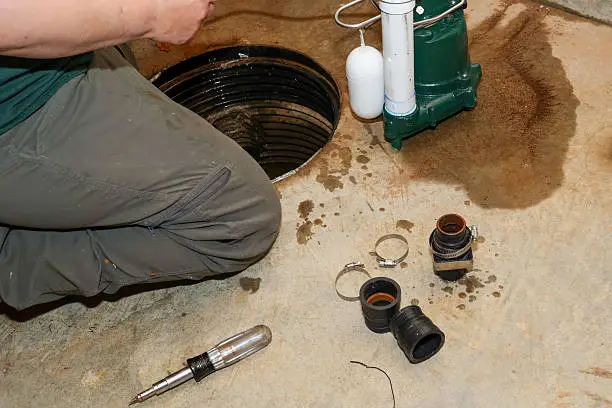
How to Replace a Sump Pump (DIY-Friendly Steps)
You do not have to be a plumbing expert to replace your pump, but only time and minimal equipment.
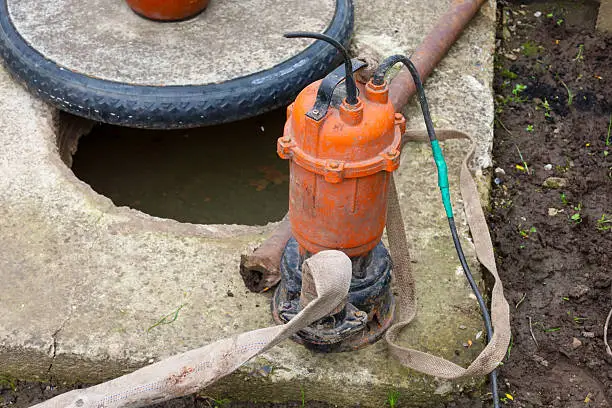
- Take the old one out. Unplug, pipe, remove the old pump, and wipe the pit clean so that the new pump fits flat.
- Connect the new line to it and tighten all the clamps.
- Gently drop that pump into the pit and do not bruise the float switch. Plug it, rinse the pit, and find out whether it runs or not. If it’s smooth, you’re all set. It is a successful Sump Pump Replacement.
It is probably safer to call in a professional, unless you have previously encountered plumbing tools. They can make sure that your pump is connected perfectly to a more complicated drainage system.
How to Keep Your New Pump Running Longer
Frequent maintenance is the most effective protection against positioning it after Sump Pump Replacement. You may start by putting water into the pit every three months. Clean out the jack, the pit, and check the line on the discharge every year. It is also a good idea to install a battery backup, as storms and power outages go hand in hand, and your pump can’t operate without electricity.
Conclusion
In conclusion, Sump Pump replacement yourself can be a practical way to save money and keep your basement protected, as long as you understand the common issues that may arise. By carefully diagnosing problems like power failures, clogged discharge lines, or faulty float switches, you can address them before they lead to bigger damage. Always follow safety precautions and consult your pump’s manual when in doubt. Remember that proper installation and routine maintenance go a long way in preventing future breakdowns. If a problem seems beyond your comfort level, calling a professional is always a smart choice to ensure long-lasting protection.
FAQs
- How often should a sump pump be replaced?
Most pumps last 7–10 years, depending on use, maintenance, and water volume. - Are all sump pumps DIY-friendly to replace?
Most basic models are, but complex systems or backup pumps may require a technician. - What size pump do I need for my home?
It depends on your drainage needs, basin size, and how much water your basement typically receives. - Why does my sump pump keep running nonstop?
This happens when the float switch is stuck, the pit is clogged, or the pump is undersized. - Is a battery backup worth it?
Storms often cause power outages, and a backup prevents flooding when your main pump stops.